Lincoln Aviator 2020-2026 Owners Manual / Seatbelts / Seatbelt Height Adjustment

Lincoln Aviator: Seatbelts / Seatbelt Height Adjustment

WARNING: Position the seatbelt height adjuster so that the seatbelt rests across the middle of your shoulder. Failure to adjust the seatbelt correctly could reduce its effectiveness and increase the risk of injury in a crash.

  1. Adjust the height of the shoulder belt so the belt rests across the middle of your shoulder.
  2. Slide the adjuster up to raise the belt. Press the button and slide it down to lower the belt.

    Lincoln Aviator. Seatbelt Height Adjustment


    Seatbelt Locking Modes

    WARNING: If your vehicle is involved in a crash, have the seatbelts and associated components inspected as soon as possible. Failure to follow this instruction could result in personal injury or death...

    Seatbelt Warning Lamp and Indicator Chime

    ..

    Other information:

    Lincoln Aviator 2020-2026 Service Manual: Diagnosis and Testing - Interior Lighting


    Diagnostic Trouble Code (DTC) Chart Diagnostics in this manual assume a certain skill level and knowledge of Ford-specific diagnostic practices. REFER to: Diagnostic Methods (100-00 General Information, Description and Operation).   Diagnostic Trouble Code Chart Module   DTC Description Action   BCM B1175:01 Driver Door Ajar Switch:General Electrical Failure If the courtesy lamps are inoperative, GO to Pinpoint Test A   BCM B1175:01 Driver Door Ajar Switch:General Electrical Failure If the courtesy lamps are always on, GO to Pinpoint Test C   BCM B1176:01 Passenger Door Ajar Switch:General Electrical Failure If the courtesy lamps are inoperative, GO to Pinpoint Test A   BCM B1176:01 Passenger Door Ajar Switch:General Electrical Failure If the courtesy lamps are always on, GO to Pinpoint Test C   BCM B11C0:01 Driver Side Rear Door Ajar Switch:General Electrical Failure If the courtesy lamps are inoperative, GO to Pinpoint Test A   BCM B11C0:01 Driver Side Rear Door Ajar Switch:General Electrical Failure If the courtesy lamps are always on, GO to Pinpoint Test C   BCM B11C1:01 Passenger Side Rear Door Ajar Switch:General Electrical Failure If the courtesy lamps are inoperative, GO to Pinpoint Test A   BCM B11C1:01 Passenger Side Rear Door Ajar Switch:General Electrical Failure If the courtesy lamps are always on, GO to Pinpoint Test C   BCM B12C2:11 Puddle Lamp:Circuit Short To Ground   GO to Pinpoint Test H   BCM B12C2:15 Puddle Lamp:Circuit Short To Battery or Open   GO to Pinpoint Test H   BCM B1306:01 Liftgate Ajar Switch:General Electrical Failure   GO to Pinpoint Test K   BCM B1306:11 Liftgate Ajar Switch:Circuit Short To Ground   GO to Pinpoint Test K   BCM B1313:11 Interior Lighting Output:Circuit Short To Ground   GO to Pinpoint Test B   BCM B1313:15 Interior Lighting Output:Circuit Short To Battery or Open If the courtesy lamps are always on, GO to Pinpoint Test B   BCM B1313:15 Interior Lighting Output:Circuit Short To Battery or Open If the courtesy lamps are always on, GO to Pinpoint Test D   BCM B145C:11 Ambient Lighting Power Supply Output:Circuit Short To Ground   GO to Pinpoint Test I   BCM B145C:15 Ambient Lighting Power Supply Output:Circuit Short To Battery or Open   GO to Pinpoint Test I   BCM B1465:00 Ambient Lighting Bus 1:No Sub Type Information If all the ambient lighting is inoperative, always on or does not change color/intensity, GO to Pinpoint Test I   BCM B1465:00 Ambient Lighting Bus 1:No Sub Type Information If one or more of the ambient lighting Light Emitting Diodes (LEDs) are inoperative or do not change color/intensity, GO to Pinpoint Test J   BCM B1465:96 Ambient Lighting Bus 1:Component Internal Failure If all the ambient lighting is inoperative, always on or does not change color/intensity, GO to Pinpoint Test I   BCM B1465:96 Ambient Lighting Bus 1:Component Internal Failure If one or more of the ambient lighting Light Emitting Diodes (LEDs) are inoperative or do not change color/intensity, GO to Pinpoint Test J   BCM B1467:00 Ambient Lighting Bus 3:No Sub Type Information If all the ambient lighting is inoperative, always on or does not change color/intensity, GO to Pinpoint Test I   BCM B1467:00 Ambient Lighting Bus 3:No Sub Type Information If one or more of the ambient lighting Light Emitting Diodes (LEDs) are inoperative or do not change color/intensity, GO to Pinpoint Test J   BCM B1467:96 Ambient Lighting Bus 3:Component Internal Failure If all the ambient lighting is inoperative, always on or does not change color/intensity, GO to Pinpoint Test I   BCM B1467:96 Ambient Lighting Bus 3:Component Internal Failure If one or more of the ambient lighting Light Emitting Diodes (LEDs) are inoperative or do not change color/intensity, GO to Pinpoint Test J   BCM B14AA:11 Demand Lamp Output:Circuit Short To Ground   GO to Pinpoint Test E   BCM B14AA:15 Demand Lamp Output:Circuit Short To Battery or Open   GO to Pinpoint Test E   BCM B153C:11 Color Ambient Light Output:Circuit Short To Ground   GO to Pinpoint Test I   BCM B153C:15 Color Ambient Light Output:Circuit Short To Battery or Open   GO to Pinpoint Test I   DCME B1175:19 Drivers Door Ajar Switch:Circuit Current Above Threshold   GO to Pinpoint Test C   DCMF B1176:19 Passenger Door Ajar Switch:Circuit Current Above Threshold   GO to Pinpoint Test C   DCMG B11C0:19 Driver Side Rear Door Ajar Switch:Circuit Current Above Threshold   GO to Pinpoint Test C   DCMH B11C1:19 Passenger Side Rear Door Ajar Switch:Circuit Current Above Threshold   GO to Pinpoint Test C   DDM B1165:11 Left Front Puddle Lamp Output:Circuit Short To Ground   GO to Pinpoint Test G   DDM B1165:15 Left Front Puddle Lamp Output:Circuit Short To Battery Or Open   GO to Pinpoint Test G   PDM B1166:11 Right Front Puddle Lamp Output:Circuit Short To Ground   GO to Pinpoint Test G   PDM B1166:15 Right Front Puddle Lamp Output:Circuit Short To Battery Or Open   GO to Pinpoint Test G   RGTM B1306:12 Liftgate Ajar Switch:Circuit Short To Battery   GO to Pinpoint Test C Symptom Chart(s) Diagnostics in this manual assume a certain skill level and knowledge of Ford-specific diagnostic practices...

    Lincoln Aviator 2020-2026 Service Manual: Removal and Installation - Occupant Classification System (OCS) Sensor - Vehicles With: Multi-Contour Seats


    Special Tool(s) / General Equipment Flat Headed Screw Driver Removal   WARNING: The following procedure prescribes critical repair steps required for correct restraint system operation during a crash. Follow all notes and steps carefully...

    Categories

    Fastening the Seatbelts

    The front outboard and rear safety restraints in the vehicle are combination lap and shoulder belts.

    Insert the belt tongue into the proper buckle (the buckle closest to the direction the tongue is coming from) until you hear a snap and feel it latch. Make sure that you securely fasten the tongue in the buckle.

    Lincoln Aviator. Fastening the Seatbelts

    To unfasten, press the release button and remove the tongue from the buckle.

    read more

     
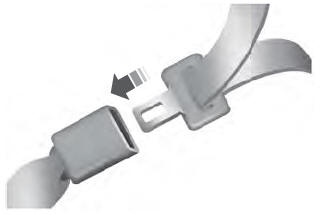
    Copyright © 2026 www.liaviator2.com