Lincoln Aviator 2020-2025 Service Manual / Powertrain / Automatic Transmission / Automatic Transmission - 10-Speed Automatic Transmission – 10R60 / Removal and Installation - Transmission Support Insulator
Lincoln Aviator: Automatic Transmission - 10-Speed Automatic Transmission – 10R60 / Removal and Installation - Transmission Support Insulator
Special Tool(s) / General Equipment
| Transmission Jack | |
| Wooden Block |
Removal
-
With the vehicle in NEUTRAL, position it on a hoist.
Refer to: Jacking and Lifting (100-02 Jacking and Lifting, Description and Operation).
-
Using a high-lift transmission jack and wooden blocks, support the transmission.
Use the General Equipment: Transmission Jack
Use the General Equipment: Wooden Block
.jpg) |
Four-Wheel Drive (4WD) vehicles
-
Remove and discard the bolts (W719431) and the nut (W520214).
.jpg) |
Rear Wheel Drive (RWD) vehicles
-
Remove and discard the bolts (W719431) and the nut (W520214).
.jpg) |
All vehicles
-
Remove and discard the bolts (W720576) and remove the transmission support insulator.
.jpg) |
Installation
-
Install the transmission support insulator and tighten the new bolts in the sequence shown.
Torque: 59 lb.ft (80 Nm)
.jpg) |
Rear Wheel Drive (RWD) vehicles
-
Install the new bolts and the new nut and tighten in the sequence shown.
Torque: 76 lb.ft (103 Nm)
.jpg) |
Four-Wheel Drive (4WD) vehicles
-
Install the new bolts and the new nut and tighten in the sequence shown.
Torque: 76 lb.ft (103 Nm)
.jpg) |
 Removal and Installation - Transmission Range (TR) Sensor
Special Tool(s) /
General Equipment
307-783Installer, Roll Pin
Rubber Mallet
Punch
Materials
Name
Specification
Motorcraft® MERCON® ULV Automatic Transmission FluidXT-12-QULV
WSS-M2C949-A, MERCON® ULV
Removal
Remove the main control valve body...
 Removal and Installation - Turbine Shaft Speed (TSS) Sensor
Removal
Remove the main control valve body.
Refer to: Main Control Valve Body (307-01A Automatic Transmission - 10-Speed Automatic Transmission – 10R60, Removal and Installation)...
Other information:
Lincoln Aviator 2020-2025 Service Manual: Removal and Installation - Rear Shock Absorber
Special Tool(s) / General Equipment Vehicle/Axle Stands Removal NOTICE: Suspension fasteners are critical parts that affect the performance of vital components and systems. Failure of these fasteners may result in major service expense...
Lincoln Aviator 2020-2025 Service Manual: General Procedures - Driveshaft Angle Measurement
Check NOTE: Prior to checking driveline angularity, inspect the U-joints for correct operation. NOTE: An incorrect driveline angle can cause a vibration or shudder. NOTE: Driveline angularity is the angular relationship between the engine crankshaft, the driveshaft and the rear axle pinion...
Categories
- Manuals Home
- Lincoln Aviator Owners Manual
- Lincoln Aviator Service Manual
- Disabling Auto-Start-Stop
- Changing the Front Wiper Blades - Vehicles With: Heated Wiper Blades
- Garage Door Opener
- New on site
- Most important about car
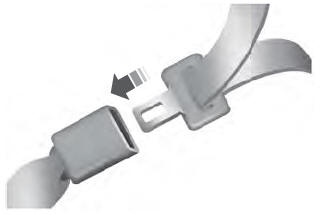
Fastening the Seatbelts
The front outboard and rear safety restraints in the vehicle are combination lap and shoulder belts.
Insert the belt tongue into the proper buckle (the buckle closest to the direction the tongue is coming from) until you hear a snap and feel it latch. Make sure that you securely fasten the tongue in the buckle.
Copyright © 2025 www.liaviator2.com
