Lincoln Aviator 2020-2025 Service Manual / Powertrain / Automatic Transmission / Transmission Cooling - 10-Speed Automatic Transmission – 10R60 / Removal and Installation - Transmission Fluid Cooler
Lincoln Aviator: Transmission Cooling - 10-Speed Automatic Transmission – 10R60 / Removal and Installation - Transmission Fluid Cooler
Special Tool(s) / General Equipment
| Locking Pliers |
Materials
| Name | Specification |
|---|---|
| Motorcraft® MERCON® ULV Automatic Transmission Fluid XT-12-QULV |
WSS-M2C949-A, MERCON® ULV |
Removal
-
With the vehicle in N, position it on a hoist.
Refer to: Jacking and Lifting (100-02 Jacking and Lifting, Description and Operation).
-
NOTE: Be prepared to collect escaping fluid.
Loosen the clamps and disconnect the coolant hoses from the transmission fluid cooler.
Use the General Equipment: Locking Pliers
.jpg) |
-
NOTE: If equipped.
Remove the bolt.
.jpg) |
-
NOTE: Be prepared to collect escaping fluid.
Remove the bolt, the nuts and the transmission fluid cooler.
.jpg) |
Installation
-
Inspect the O-ring seals and install new O-ring seals if
necessary. Lubricate the O-ring seals before installing the
transmission fluid cooler.
Material: Motorcraft® MERCON® ULV Automatic Transmission Fluid / XT-12-QULV (WSS-M2C949-A, ) (MERCON® ULV)
.jpg) |
-
NOTICE: Make sure the oil cooler is completely installed against the transmission before tightening, or damage to the cooler could result.
Install the transmission fluid cooler and loosely install the bolt and the nuts by hand.
|
-
NOTICE: Make sure the oil cooler is completely installed against the transmission before tightening, or damage to the cooler could result.
Tighten the bolt and nuts in the sequence shown.
Torque: 18 lb.ft (25 Nm)
.jpg) |
-
NOTE: If equipped.
Install the bolt.
Torque: 18 lb.ft (25 Nm)
|
-
Connect the coolant hoses to the transmission fluid cooler.
.jpg) |
-
Check the engine coolant level and adjust as necessary.
Refer to: Engine Cooling System Draining, Vacuum Filling and Bleeding (303-03A Engine Cooling - 3.0L EcoBoost, General Procedures).
-
Check the transmission fluid level and adjust as necessary.
Refer to: Transmission Fluid Level Check (307-01A Automatic Transmission - 10-Speed Automatic Transmission – 10R60, General Procedures).
 General Procedures - Transmission Fluid Cooler - Backflushing and Cleaning
Special Tool(s) /
General Equipment
Transmission Cooling System Heated Flusher
Materials
Name
Specification
Motorcraft® MERCON® ULV Automatic Transmission FluidXT-12-QULV
WSS-M2C949-A, MERCON® ULV
Flushing
NOTE:
Use transmission fluid specified for this
transmission...

Other information:
Lincoln Aviator 2020-2025 Service Manual: Removal and Installation - Roof Front Frame
Special Tool(s) / General Equipment Resistance Spotwelding Equipment Spot Weld Drill Bit Locking Pliers Removal WARNING: Before beginning any service procedure in this manual, refer to health and safety warnings in section 100-00 General Information...
Lincoln Aviator 2020-2025 Owners Manual: Using the System
Note: The 360 degree camera system turns off when your vehicle is in motion at low speed, except when in reverse (R). The front and rear cameras have multiple screens which consist of: normal view with 360, normal view, and split view. When in park (P), neutral (N) or drive (D), only the front images display when you press the button...
Categories
- Manuals Home
- Lincoln Aviator Owners Manual
- Lincoln Aviator Service Manual
- Drive Modes
- Locking and Unlocking
- Remove and Reinstall the Battery
- New on site
- Most important about car
Fastening the Seatbelts
The front outboard and rear safety restraints in the vehicle are combination lap and shoulder belts.
Insert the belt tongue into the proper buckle (the buckle closest to the direction the tongue is coming from) until you hear a snap and feel it latch. Make sure that you securely fasten the tongue in the buckle.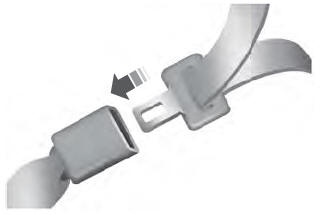
Copyright © 2025 www.liaviator2.com