Lincoln Aviator: Engine - 3.0L EcoBoost / Removal and Installation - Oil Pump
Removal
NOTICE: During engine repair procedures, cleanliness is extremely important. Any foreign material, including any material created while cleaning gasket surfaces, that enters the oil passages, coolant passages or the oil pan, can cause engine failure.
-
Remove the engine front cover.
-
Remove the bolts and the oil pump return tube.
.jpg) |
-
Remove and discard the O-ring seals.
.jpg) |
-
Remove the bolts and the splash shield.
.jpg) |
-
-
Remove the oil pump bolts.
-
Lower the rear of the oil pump assembly.
-
Separate the oil pump sprocket from the oil pump drive belt.
-
Remove the oil pump bolts.
.jpg) |
Installation
-
Prime the oil pump. Add 2 tablespoons of clean engine oil to the oil pump and rotate the oil pump by hand.
-
NOTE: Make sure the oil pump drive belt teeth are engaged in the crankshaft sprocket prior to installing the oil pump.
-
Install the oil pump sprocket into the oil pump drive belt.
-
Raise the rear of the oil pump assembly into the installed position.
-
Install the oil pump bolts.
Torque:
Stage 1: 89 lb.in (10 Nm)
Stage 2: 45°
-
Install the oil pump sprocket into the oil pump drive belt.
.jpg) |
-
Install the splash shield and the bolts.
Torque: 89 lb.in (10 Nm)
.jpg) |
-
-
Install new O-ring seals.
-
Lubricate the O-ring seals with clean engine oil.
-
Install new O-ring seals.
.jpg) |
-
Install the oil pump return tube and the bolts.
Torque: 89 lb.in (10 Nm)
.jpg) |
-
Install the engine front cover.
 Removal and Installation - Oil Pan
Materials
Name
Specification
Motorcraft® High Performance Engine RTV SiliconeTA-357
WSE-M4G323-A6
Motorcraft® Silicone Gasket RemoverZC-30-A
-
Motorcraft® Metal Surface Prep WipesZC-31-B
-
Motorcraft® Metal Brake Parts CleanerPM-4-A, PM-4-B
-
Removal
NOTICE:
During engine repair procedures, cleanliness is extremely
important...
 Removal and Installation - Oil Pump Drive Belt
Removal
NOTICE:
During engine repair procedures, cleanliness is extremely
important. Any foreign material, including any material created while
cleaning gasket surfaces, that enters the oil passages, coolant passages
or the oil pan, can cause engine failure...
Other information:
Lincoln Aviator 2020-2025 Owners Manual: Head Up Display Overview
Signaling and Traffic Indication. Navigation Display Area. ADAS Display Area. System Message Display Area. ADAS Message Display Area. Status Bar. Speed Limit Display Area. Speedometer Display Area. Signaling and Traffic Indication Displays direction indicators and blind spot information (if direction indicators are active)...
Lincoln Aviator 2020-2025 Service Manual: Specifications
Lubricants, Fluids, Sealers and Adhesives Specification DOT 4 LV brake fluid WSS-M6C65-A2 Torque Specifications Item Nm lb-ft lb-in Front caliper bleeder screw 8 -- 71 Rear caliper bleeder screw 10 -- 89 Front Disc Brake Specification Item 345 mm 363 mm Front brake disc minimum thickness 1...
Categories
- Manuals Home
- Lincoln Aviator Owners Manual
- Lincoln Aviator Service Manual
- Drive Modes
- Activating Intelligent Access
- Garage Door Opener
- New on site
- Most important about car
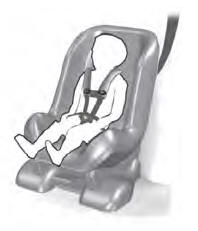
Child Seats

Use a child restraint (sometimes called an infant carrier, convertible seat, or toddler seat) for infants, toddlers and children weighing 40 lb (18 kg) or less (generally four-years-old or younger).
Using Lap and Shoulder Belts
WARNING: Do not place a rearward facing child restraint in front of an active airbag. Failure to follow this instruction could result in personal injury or death.
