Lincoln Aviator 2020-2025 Service Manual / Body and Paint / Body and Paint / Interior Trim and Ornamentation / Removal and Installation - Headliner - Lowering
Lincoln Aviator: Interior Trim and Ornamentation / Removal and Installation - Headliner - Lowering
Special Tool(s) / General Equipment
| Pick Hook | |
| Interior Trim Remover |
-
Remove the following items:
-
On both sides.
Remove the A-pillar trim panel.
Refer to: A-Pillar Trim Panel (501-05 Interior Trim and Ornamentation, Removal and Installation).
-
On both sides.
Remove the upper B-pillar trim panel.
Refer to: B-Pillar Trim Panel (501-05 Interior Trim and Ornamentation, Removal and Installation).
-
On both the sides.
Remove the C-pillar trim panel.
Refer to: C-Pillar Trim Panel (501-05 Interior Trim and Ornamentation, Removal and Installation).
-
On both sides.
-
On LH side.
Position the headliner wiring harness aside.
-
Disconnect the headliner wiring harness electrical connectors.
-
Release the headliner wiring harness retainers.
Use the General Equipment: Interior Trim Remover
-
Disconnect the headliner wiring harness electrical connectors.
.jpg) |
-
On RH side.
Position the headliner wiring harness aside.
-
Disconnect the headliner wiring harness electrical connector.
-
Release the headliner wiring harness retainers.
Use the General Equipment: Interior Trim Remover
-
Disconnect the headliner wiring harness electrical connector.
.jpg) |
-
On RH side.
Position the rear wiper washer hose aside.
-
Disconnect the rear wiper washer hose coupling.
Refer to: Washer Hose Coupling (501-16 Wipers and Washers, General Procedures).
-
Release the rear wiper washer hose from the retainers.
-
Disconnect the rear wiper washer hose coupling.
.jpg) |
-
NOTE: Interior rear view mirror removed for clarity.
If equipped.
Release the clips and remove the interior rear view mirror cover.
Use the General Equipment: Interior Trim Remover
.jpg) |
-
NOTE: Interior rear view mirror removed for clarity.
If equipped.
Disconnect the headliner wiring harness electrical connectors.
-
Disconnect the humidity and temperature sensor electrical connector.
-
Disconnect the interior rear view mirror electrical connector.
-
Disconnect the front vision camera electrical connector.
-
Disconnect the rain sensor electrical connector.
-
Disconnect the heated windshield grid electrical connector.
-
Disconnect the humidity and temperature sensor electrical connector.
.jpg) |
-
NOTE: LH shown, RH similar.
On both sides.
Remove the sun visor.
-
Position the sun visor screw cover aside.
-
Remove the sun visor screw.
-
Rotate the sun visor assembly down.
-
If equipped.
Disconnect the sun visor electrical connector.
-
Position the sun visor screw cover aside.
.jpg) |
-
NOTE: LH shown, RH similar.
On both sides.
Remove the screw and the sun visor clip.
.jpg) |
-
On RH side.
Remove the front assist handle.
-
Position the front assist handle down.
-
Remove the front assist handle retainers.
Use the General Equipment: Pick Hook
-
Position the front assist handle down.
.jpg) |
-
NOTE: LH shown, RH similar.
On both sides.
Remove the rear assist handle.
-
Position the rear assist handle down.
-
Remove the rear assist handle retainers.
Use the General Equipment: Pick Hook
-
Position the rear assist handle down.
.jpg) |
-
On RH side.
Disconnect the rear wiper washer hose coupling.
Refer to: Washer Hose Coupling (501-16 Wipers and Washers, General Procedures).
.jpg) |
-
On both sides.
Position the front seat backrest in the fully reclined position.
.jpg) |
-
On both sides.
Position the second row seat backrest in the fold flat position.
.jpg) |
-
Position the third row seat backrests in the fold flat position.
.jpg) |
-
NOTE: Seats removed for clarity.
Release the rear clips and lower the headliner.
Use the General Equipment: Interior Trim Remover
.jpg) |
 Removal and Installation - Headliner
Special Tool(s) /
General Equipment
Pick Hook
Interior Trim Remover
Materials
Name
Specification
3M™ Super-Fast Repair Adhesive04747
-
Removal
Remove the following items:
On both sides...
 Removal and Installation - Liftgate Trim Panel
Special Tool(s) /
General Equipment
Interior Trim Remover
Removal
Release the clips and remove the liftgate center upper trim panel...
Other information:
Lincoln Aviator 2020-2025 Service Manual: Removal and Installation - Rear Door Trim Panel
Special Tool(s) / General Equipment Interior Trim Remover Removal NOTE: LH (left hand) shown, RH (right hand) similar. NOTE: Removal steps in this procedure may contain installation details. Remove the rear door window control switch...
Lincoln Aviator 2020-2025 Owners Manual: Cross Traffic Alert
WARNING: Do not use the cross traffic alert system as a replacement for using the interior and exterior mirrors or looking over your shoulder before reversing out of a parking space. The cross traffic alert system is not a replacement for careful driving...
Categories
- Manuals Home
- Lincoln Aviator Owners Manual
- Lincoln Aviator Service Manual
- Wireless Accessory Charger (If Equipped)
- Description and Operation - Jacking and Lifting
- Body and Paint
- New on site
- Most important about car
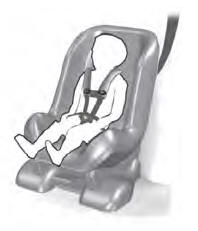
Child Seats

Use a child restraint (sometimes called an infant carrier, convertible seat, or toddler seat) for infants, toddlers and children weighing 40 lb (18 kg) or less (generally four-years-old or younger).
Using Lap and Shoulder Belts
WARNING: Do not place a rearward facing child restraint in front of an active airbag. Failure to follow this instruction could result in personal injury or death.
Copyright © 2025 www.liaviator2.com
