Lincoln Aviator 2020-2025 Service Manual / Body and Paint / Body and Paint / Body Closures / Removal and Installation - Fuel Filler Door Assembly
Lincoln Aviator: Body Closures / Removal and Installation - Fuel Filler Door Assembly
Special Tool(s) / General Equipment
| Flat Headed Screw Driver | |
| Knife |
Removal
NOTE: Removal steps in this procedure may contain installation details.
NOTE: The fuel filler door assembly is damaged during the removal process and requires a new fuel filler door assembly installed.
-
Remove the fuel filler door.
Refer to: Fuel Filler Door (501-03 Body Closures, Removal and Installation).
-
With the vehicle in NEUTRAL, position it on a hoist.
Refer to: Jacking and Lifting (100-02) .
-
Remove the LHR wheel and tire.
Refer to: Wheel and Tire (204-04A Wheels and Tires, Removal and Installation).
-
-
Remove the nuts.
Torque: 22 lb.in (2.5 Nm)
-
Remove the screws.
Torque: 13 lb.in (1.5 Nm)
-
Remove the bolt.
Torque: 89 lb.in (10 Nm)
-
Remove the LHR wheel liner.
-
Remove the nuts.
.jpg) |
-
Loosen the clamp and disconnect the hose. Position the hose aside.
Torque: 28 lb.in (3.2 Nm)
.jpg) |
-
Remove the quick release couplings.
Refer to: Quick Release Coupling (310-00A Fuel System - General Information - 3.0L EcoBoost, General Procedures).
.jpg) |
-
NOTE: Use new bolts.
-
Remove and discard the bolts.
Torque: 80 lb.in (9 Nm)
-
Position the fuel tank filler pipe and drain hose assembly aside.
-
Remove and discard the bolts.
.jpg) |
-
Using a knife, slice the holes in the indicated areas.
Use the General Equipment: Knife
.jpg) |
-
Insert the screwdriver and release the clips while pulling the fuel filler door housing away from the vehicle.
Use the General Equipment: Flat Headed Screw Driver
.jpg) |
-
-
Pull the fuel filler door housing away from the
vehicle to disconnect the electrical connector and drain hose.
-
Position the fuel filler neck as needed to remove the fuel filler door assembly.
-
Pull the fuel filler door housing away from the
vehicle to disconnect the electrical connector and drain hose.
.jpg) |
Installation
-
To install, reverse the removal procedure.
 Removal and Installation - Fuel Filler Door
Removal
NOTE:
Removal steps in this procedure may contain installation details.
Open the fuel filler door.
Using a screwdriver, pry the retaining tab back and slide the fuel filler door from the fuel filler door hinge...
 Removal and Installation - Fuel Filler Door Assembly - Plug-In Hybrid Electric Vehicle (PHEV)
Special Tool(s) /
General Equipment
Flat Headed Screw Driver
Knife
Removal
NOTE:
Removal steps in this procedure may contain installation details...
Other information:
Lincoln Aviator 2020-2025 Owners Manual: Getting the Services You Need
Warranty repairs to your vehicle must be performed by an authorized dealer. While any authorized dealer handling your vehicle line provides warranty service, we recommend you return to your selling authorized dealer who wants to ensure your continued satisfaction...
Lincoln Aviator 2020-2025 Service Manual: Description and Operation - D Clutch
Overview Item Description 1 SSD 2 D clutch control valve 3 Clutch gain control valve 4 D clutch apply circuit 5 D clutch piston 6 D clutch assembly 7 Planetary carrier No...
Categories
- Manuals Home
- Lincoln Aviator Owners Manual
- Lincoln Aviator Service Manual
- Activating Intelligent Access
- Drive Modes
- Resetting the System
- New on site
- Most important about car
Child Seats
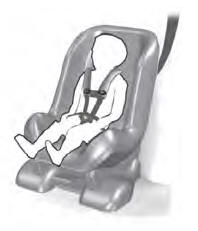
Use a child restraint (sometimes called an infant carrier, convertible seat, or toddler seat) for infants, toddlers and children weighing 40 lb (18 kg) or less (generally four-years-old or younger).
Using Lap and Shoulder Belts
WARNING: Do not place a rearward facing child restraint in front of an active airbag. Failure to follow this instruction could result in personal injury or death.
Copyright © 2025 www.liaviator2.com