Lincoln Aviator 2020-2025 Service Manual / Electrical / Information and Entertainment Systems / Information and Entertainment System - General Information / Removal and Installation - Subwoofer Speaker
Lincoln Aviator: Information and Entertainment System - General Information / Removal and Installation - Subwoofer Speaker
Removal
NOTE: Removal steps in this procedure may contain installation details.
All vehicles
-
Remove the LH loadspace trim panel.
Refer to: Loadspace Trim Panel (501-05 Interior Trim and Ornamentation, Removal and Installation).
Vehicles not equipped with Harmon® audio systems
-
Position the subwoofer assembly to access rear connectors.
-
Remove the nut and bracket.
Torque: 80 lb.in (9 Nm)
-
Remove the bolts.
Torque: 80 lb.in (9 Nm)
-
Remove the nut and bracket.
.jpg) |
-
Disconnect the electrical connector and remove the subwoofer assembly.
.jpg) |
-
Remove the screws and the amplifier.
.jpg) |
Vehicles equipped with Harmon® audio systems
-
Disconnect the subwoofer electrical connector.
.jpg) |
-
Position the subwoofer assembly to access rear connectors.
-
Remove the nut.
Torque: 80 lb.in (9 Nm)
-
Remove the bolts.
Torque: 80 lb.in (9 Nm)
-
Remove the nut.
.jpg) |
-
Disconnect the electrical connectors and remove the subwoofer assembly.
.jpg) |
-
Remove the screws and the DSP.
.jpg) |
Installation
-
To install, reverse the removal procedure.
 Removal and Installation - SYNC Module [APIM]
Special Tool(s) /
General Equipment
Interior Trim Remover
Removal
NOTE:
Removal steps in this procedure may contain installation details...
Other information:
Lincoln Aviator 2020-2025 Owners Manual: Motorcraft Parts - Excluding: Plug-In Hybrid Electric Vehicle (PHEV)
1 If a Motorcraft oil filter is not available, use an oil filter that meets industry performance specification SAE/USCAR-36. 2 See your authorized dealer for correct replacement. 3 For spark plug replacement, contact your authorized dealer. Replace the spark plugs at the appropriate intervals...
Lincoln Aviator 2020-2025 Owners Manual: Multi-Point Inspection
In order to keep your vehicle running right, it is important to have the systems on your vehicle checked regularly. This can help identify potential issues and prevent major problems. We recommend having the following multi-point inspection performed at every scheduled maintenance interval to help make sure your vehicle keeps running great...
Categories
- Manuals Home
- Lincoln Aviator Owners Manual
- Lincoln Aviator Service Manual
- Wireless Accessory Charger (If Equipped)
- Refueling
- Interior Lamps
- New on site
- Most important about car
Fastening the Seatbelts
The front outboard and rear safety restraints in the vehicle are combination lap and shoulder belts.
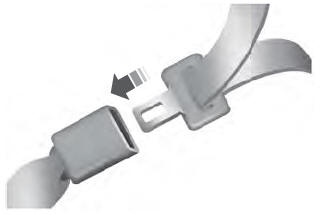
Insert the belt tongue into the proper buckle (the buckle closest to the direction the tongue is coming from) until you hear a snap and feel it latch. Make sure that you securely fasten the tongue in the buckle.
Copyright © 2025 www.liaviator2.com

